多媒体测试系统
 
STUDENT
 
FACULTY
 
SCHOOL
 
SUPPORT
 
PUBLIC
 
SIGNUP
DAILY QUIZ
 
     
  B U L L E T I N    B O A R D

Oracle Client Setup and Account Admin

(Subject: Database/Authored by: Liping Liu on 10/5/2025 4:00:00 AM)/Views: 7280
Blog    News    Post   

Oracle Data Access Component for Database Programming

If you need to connect to Oracle in Visual Studio to program Oracle databases, you just need to download Oracle.ManagedDataAccess.dll, a dynamic link library file,  without installing the full Oracle client as instructed below. You can then include the DLL file into your project by going to Project --> Add References --> Browse menu choices. 

Oracle Instant Client for Windows
Follow this guideline prior to a custom installation of ROracle. This guide is also for the users who just need to connect to Oracle databases using SQL*Plus (without installing the full client as instructed below). Here are the simple steps to follow:
 
  1. Download Oracle Instant Client 64-bit for Windows, including basic package, sql*plus package, and SDK package from https://www.oracle.com/database/technologies/instant-client/winx64-64-downloads.html
  2. Unzip all the basic package zip files to a folder, say c:\instantclient, and then unzip sql*plus and SDK packages into the same folder. Create a folder called Network inside c:\instantclient. In the end, the c:\instantclient folder should look like the following after unzipping the three compressed files 

Setup OCI_LIB64 and Path Environment Variables

Follow the instruction at https://www.ecourse.org/news.asp?which=5822 on how to setup Windows environment variables.
  1. Go to Control Panel -> System -> Advanced System Settings -> Environment Variables, and add C:\instantclient to the PATH variable
  2. Add a new environment variable OCI_LIB64 that has the value as c:\instantclient
  3. Logout Windows and re-login to make the PATH effective
  4. Open CMD prompt and test it out with the sqlplus command:

        sqlplus scott@//ism.uakron.edu:1521/cob19c.uanet.edu

    If you can connect with that, then you're good to go.

  5.  (optional) In order to setup alias for connections to database servers, create network\admin subdirectories inside c:\instantclient and download or copy tnsnames.ora (get a copy from your DB admin of something like tnsnames.zip or create your own with the content as follows) file into the admin directory.

# tnsnames.ora Network Configuration File loation:c:\instantclient\NETWORK\ADMIN\tnsnames.ora

ecourse.org  =
(DESCRIPTION =
(ADDRESS_LIST =
(ADDRESS = (PROTOCOL = TCP)(HOST = ecourse.org)(PORT = 1521)))
(CONNECT_DATA =(SERVICE_NAME = ol8.ecourse.org) )
)

 
COB19C =
(DESCRIPTION =
(ADDRESS_LIST =
(ADDRESS = (PROTOCOL = TCP)(HOST = ism.uakron.edu)(PORT = 1521)))
(CONNECT_DATA =(SERVICE_NAME = cob19c.uanet.edu) )
)
  • To test the installation, run CMD from windows Start button and type sqlplus to run SQLPLUS. Type scott@COB19C as user and tiger as password to see if you can login. 


Instant Client for Mac OS (for R Programming class)

Oracle does not have binary client for Mac OS. However, we can use its instant client to run SQL PLUS or simply connect to an Oracle server.  It is a bit more complicated, and here are the steps:
 

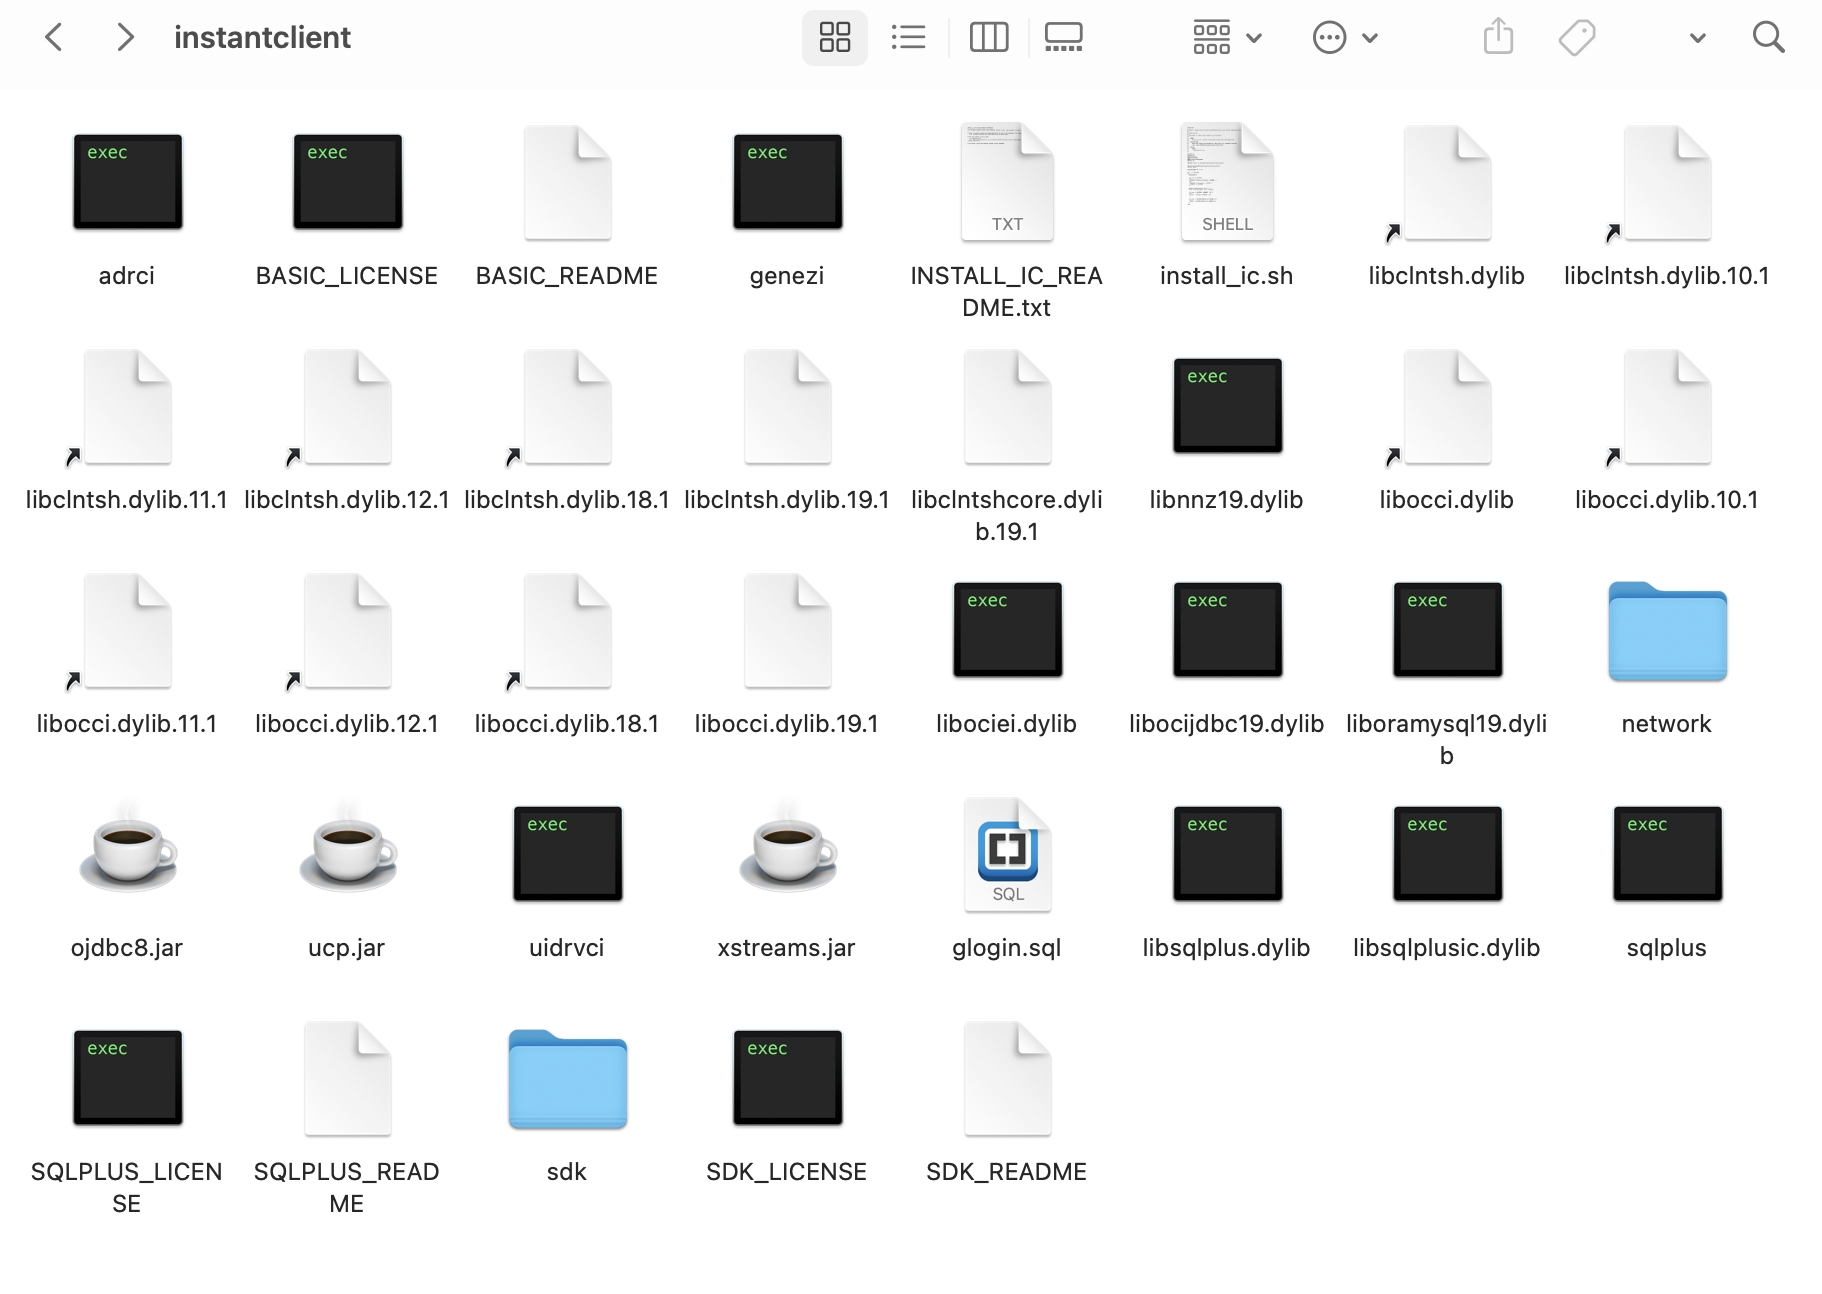
1.  Download four files from https://www.oracle.com/database/technologies/instant-client/macos-intel-x86-downloads.html and unzip all of them into instantclient inside your Downloads folder. and unzip four files from oracle.com into one folder instantclient10 inside the user's Downloads folder

instantclient-basic-macosx-10.1.0.3.zip
instantclient-sqlplus-macosx-10.1.0.3.zip
instantclient-sdk-macosx-10.1.0.3.zip
instantclient-jdbc-macosx-10.1.0.3.zip

After unzipping, instantclient folder looks like the follow:


2.  Create two symbolic links for the files that have the version appended. This step is for Ruby OCI8 driver to find what it’s looking for.

cd instantclient
ln -s libclntsh.dylib.10.1 libclntsh.dylib
ln -s libocci.dylib.10.1 libocci.dylib
cd ..

3.  Create directory /usr/local/oracle and then copy instantclient into it:

sudo mkdir /usr/local/oracle
sudo mv ~/Downloads/instantclient /usr/local/oracle/instantclient

or the following command assuming your user name is "zyz":

sudo mv /users/xyz/Downloads/instantclient /usr/local/oracle/instantclient

4.  Open the system /etc/profile

sudo nano /etc/profile

or the following command if nano is not available:
sudo pico /etc/profile

Add the following lines to /etc/profile file at the end

ORACLE_HOME="/usr/local/oracle/instantclient"
export ORACLE_HOME
DYLD_LIBRARY_PATH=$ORACLE_HOME:$DYLD_LIBRARY_PATH export DYLD_LIBRARY_PATH PATH=$ORACLE_HOME:$PATH export PATH

Then save it and reload your profile

    source /etc/profile

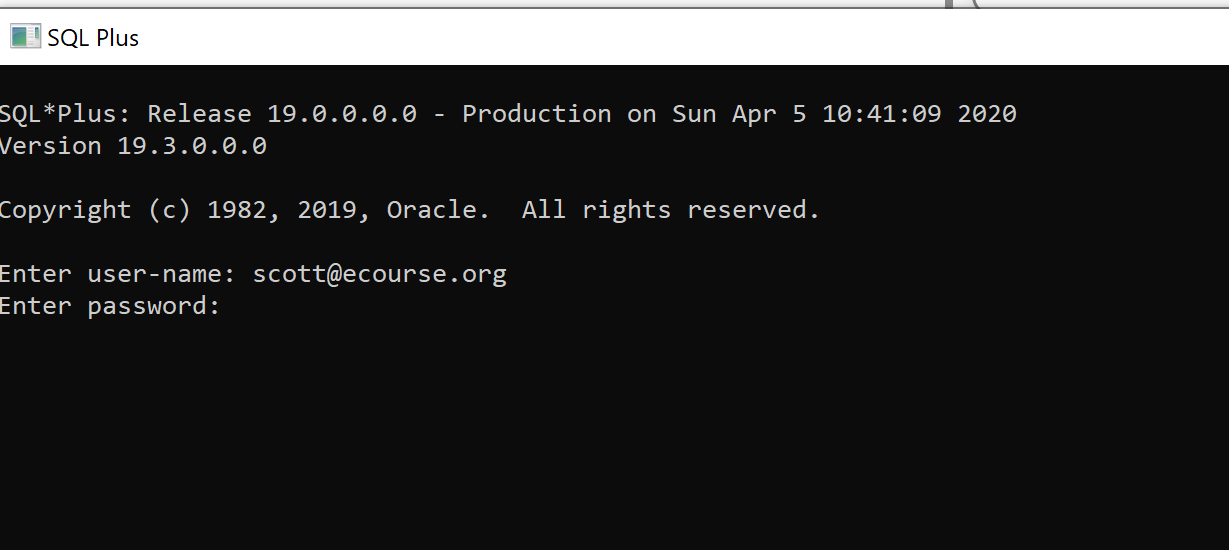
 Test it out with the sqlplus command line app.

    sqlplus scott@//ism.uakron.edu:1521/cob19c.uanet.edu

        If you can connect with that, then you're good to go.

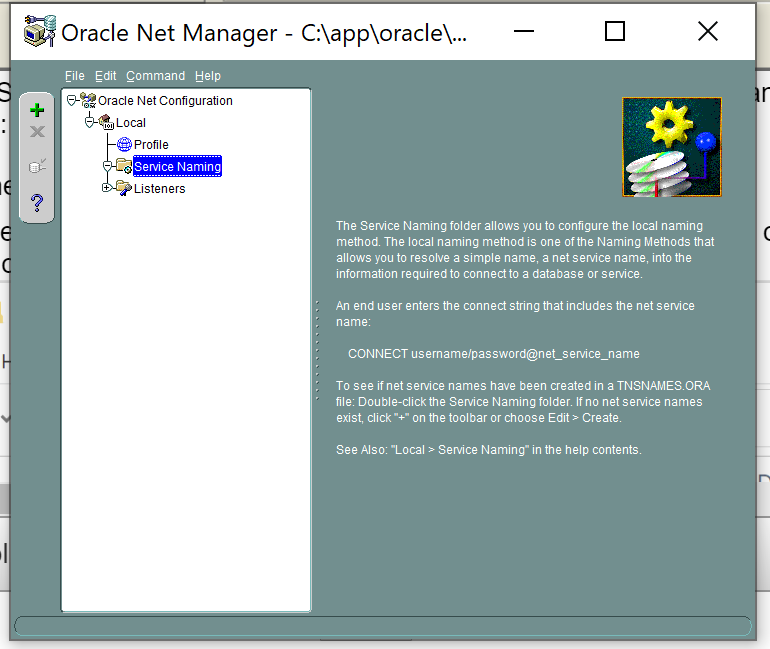
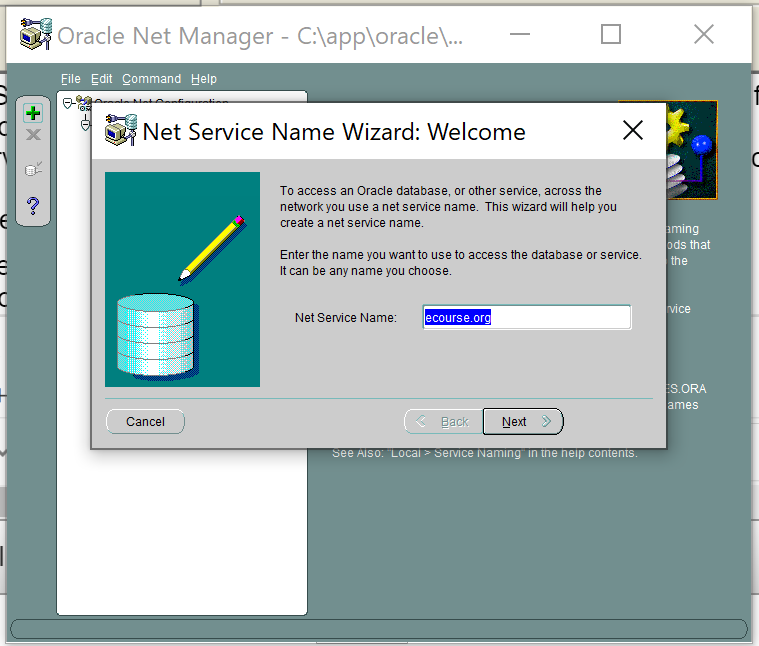
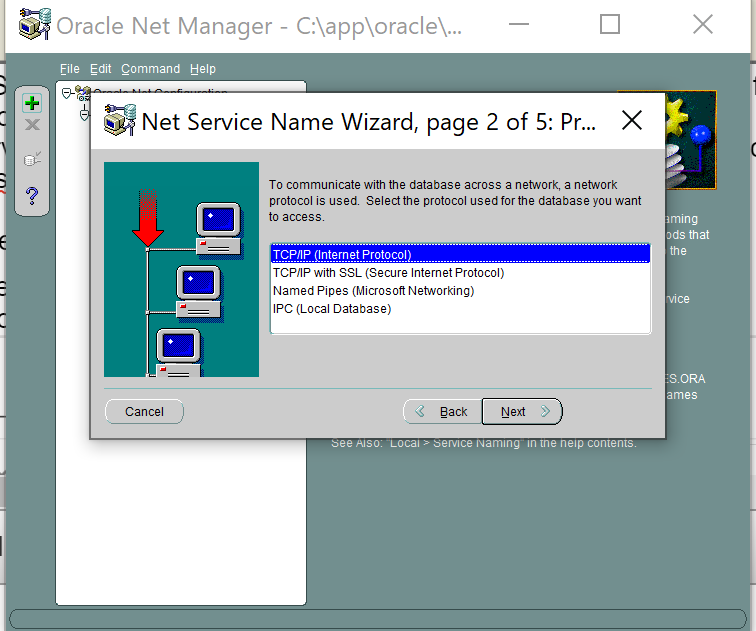
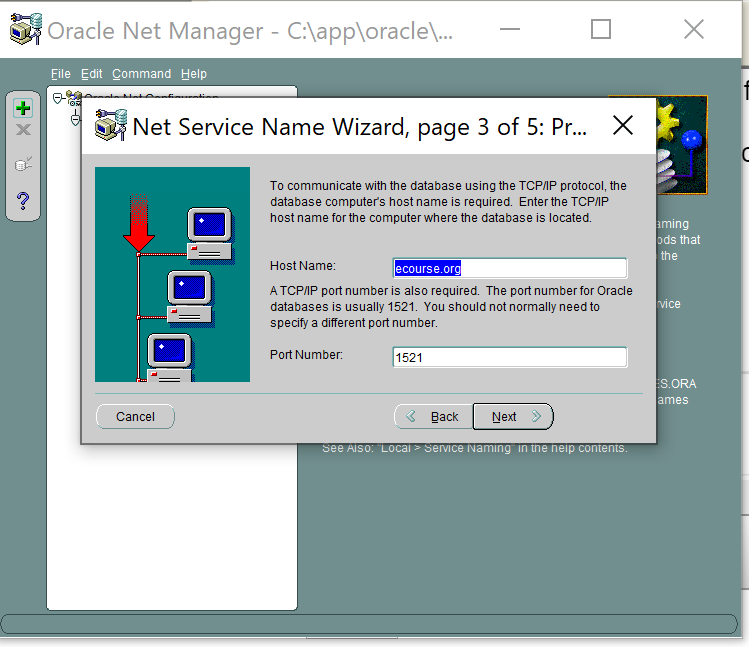
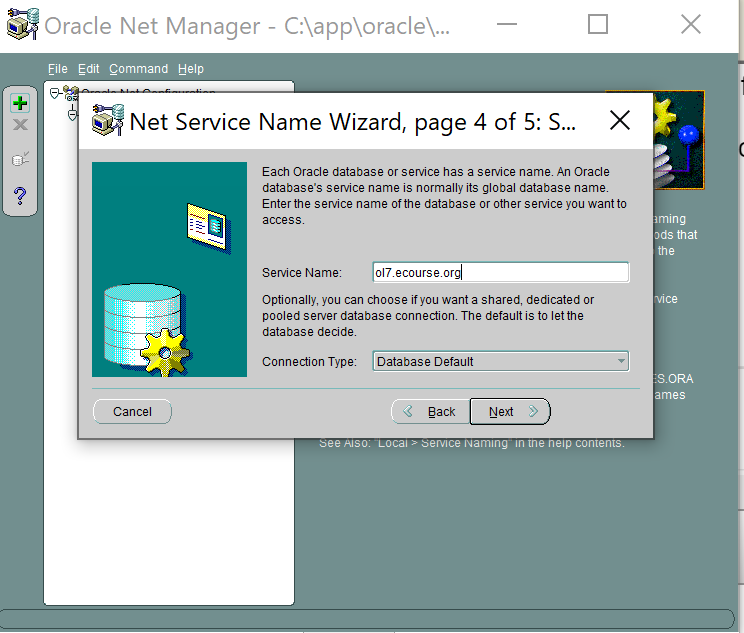
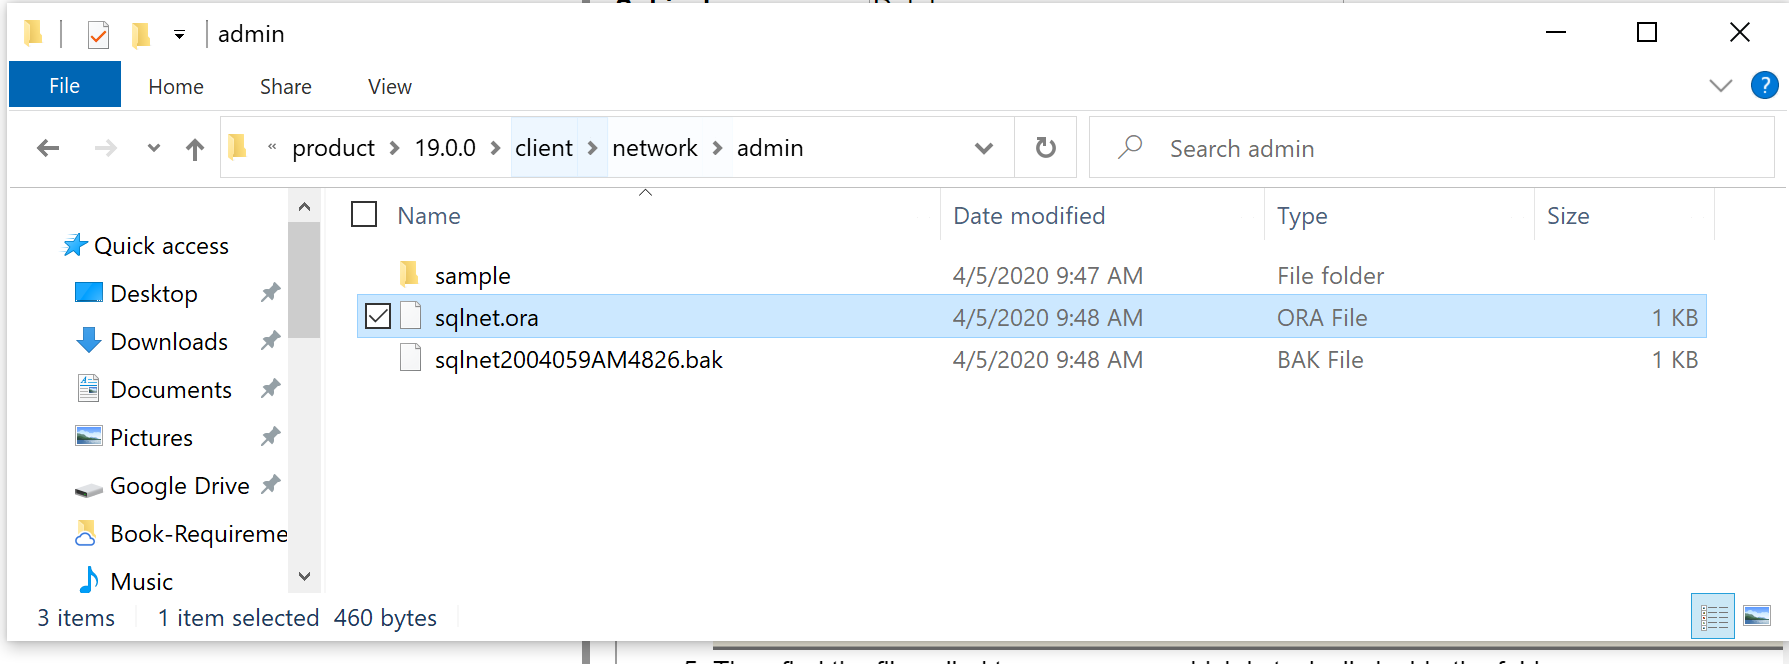
6.  (optional) Create tnsnames.ora file and move it into /usr/local/oracle/instantclient/network/admin folder:

        sudo nano tnsnames.ora 

   Add the following content to the file:     

ecourse.org =
(DESCRIPTION =
(ADDRESS_LIST =
(ADDRESS = (PROTOCOL = TCP)(HOST = ecourse.org)(PORT = 1521))
)
(CONNECT_DATA =
(SERVICE_NAME = ol8.ecourse.org)
)
)

COB19C =
(DESCRIPTION =
(ADDRESS_LIST =
(ADDRESS = (PROTOCOL = TCP)(HOST = ism.uakron.edu)(PORT = 1521))
)
(CONNECT_DATA =
(SERVICE_NAME = cob19c.uanet.edu)
)
)

cob19c.uakron.edu =
(DESCRIPTION =
(ADDRESS_LIST =
(ADDRESS = (PROTOCOL = TCP)(HOST = cobismcourses.uakron.edu)(PORT = 1521))
)
(CONNECT_DATA =
(SERVICE_NAME = cob19c.uanet.edu)
)


Save the file and put the file into the folder using the following commands:

        sudo mkdir /usr/local/oracle/instantclient/network

        sudo mkdir /usr/local/oracle/instantclient/network/admin

        sudo mv tnanames.ora /usr/local/oracle/instantclient/network/admin

        chmod 755 /usr/local/oracle/instantclient/network/admin/tnsnames.ora

Now we can use server alias such as cob19c to make connections. 


Full Oracle Client Installations and Setup for Windows 

(Note: you may need to follow VPN Setup to Connect to a test database server on Campus):

Go to https://www.oracle.com/database/technologies/oracle19c-windows-downloads.html and download Oracle database 19C client (see below, choose the second one to download):

  1. Extract the downloaded zip file, and then double click on setup file to start installation.

  2. Choose Administrator tools to install (see below)  
  3. Choose "Use Windows Built-in Account" (see below) 
  4. Chose your file location (see below for example) and press Next to continue. If during the installation, your windows defender is blocking installation, choose Allow Access to move on. The process should finish without hiccups.
  5. Now, we need to configure host strings to connect to Oracle servers. Go to Start and open Network Manager program. Click on + sign in front of Local to expand Local (see below): 
  6. Click on Service Naming and press the green + button to create a new service name. Enter ecourse.org as Net Service Name (see below for example) 
  7. Press Next and then choose TCP/IP as protocol (see below) 
  8. Press Next and enter ecourse.org as Host Name and 1521 as port number (see below) 
  9. Enter ol7.ecourse.org as Service Name (see below) 
  10. Press Next and then press Test to make sure your setup is successful (see below). If the text fails, you may need to go back to the previous steps to check for errors. 
  11. If test is successful, press Close button to dismiss the test message. Press Finish to dismiss the configuration process. 
  12. Go to File and select Save Network Configuration. Now you can exit Network Manager. 
  13. [Repeat the above Steps 6-12 to configure connection to the host cobismcourses.uakron.edu and Oracle instance with ID cob19c.uanet.edu]
  14. Now go to Start, and open SQL Plus. Enter scott@ecourse.org as user name and tiger as password to connect to ecourse.org database (see below).

Instead of the above Steps 5-10, you can create file called tnsnames.ora (using notepad) and put it inside the folder c:\app\oracle\product\19.0.0\client\network\admin (depending on your choice of installation location in Step 4). 

Copy and paste the following to the end of the file and then save the file tnsnames.ora for UA CBA Students only (Make sure the extension must be .ora, not .txt):

ecourse.org  =
(DESCRIPTION =
(ADDRESS_LIST =
(ADDRESS = (PROTOCOL = TCP)(HOST = ecourse.org)(PORT = 1521)))
(CONNECT_DATA =(SERVICE_NAME = ol8.ecourse.org) )
)

 
COB19C =
(DESCRIPTION =
(ADDRESS_LIST =
(ADDRESS = (PROTOCOL = TCP)(HOST = cobismcourses.uakron.edu)(PORT = 1521)))
(CONNECT_DATA =(SERVICE_NAME = cob19c.uanet.edu) )
)
 

Additional Commands for Teachers (with admin):
CREATE PROFILE student LIMIT
FAILED_LOGIN_ATTEMPTS 6
PASSWORD_LIFE_TIME 180
PASSWORD_REUSE_TIME 60
PASSWORD_REUSE_MAX 5
PASSWORD_LOCK_TIME 2
PASSWORD_GRACE_TIME 14;


drop role student;
create role student;
grant create session to student;
grant CREATE CLUSTER to student;
grant CREATE INDEXTYPE to student;
grant CREATE OPERATOR to student;
grant CREATE PROCEDURE to student;
grant CREATE SEQUENCE to student;
grant CREATE TABLE to student;
grant CREATE TRIGGER to student;
grant CREATE TYPE to student;
grant create view to student;
grant CREATE DATABASE LINK to student;
grant CREATE DIMENSION to Student;
grant create any index to Student;
grant CREATE JOB to student;
grant CREATE LIBRARY to student;
grant CREATE MATERIALIZED VIEW to student;
grant CREATE SYNONYM to student;
grant unlimited tablespace to student;

drop role teacher;
create role teacher;
grant create user, alter user to teacher;
grant student to teacher with admin option;

create user SCOTT identified by TIGER
default tablespace users
temporary tablespace temp
profile student;

revoke student from scott;
grant student to SCOTT; --student account


           Register

Blog    News    Post


Blog Posts    News Digest    Contact Us    About Developer    Privacy Policy

©1997-2025 ecourse.org. All rights reserved.